Estimated Time: ~20-25 minutes
Summary
Launch denial of service attacks using Airgeddon’s beacon flood capabilities to disrupt wireless network operations.
Select “Airgeddon DoS” from the menu. Allow up to 30 seconds to initialize the network.

A single attacker window will appear in your terminal. Type the following command to start airgeddon. Note that this lab uses a custom airgeddon script for ease of use in the lab environment.
./framework/airgeddon-WifiForge-Cloud/airgeddon.sh
Follow any prompts until you are asked to select an interface to work with.

Input 1 and hit enter to select Attacker-wlan0.
The menu pictured below will appear.
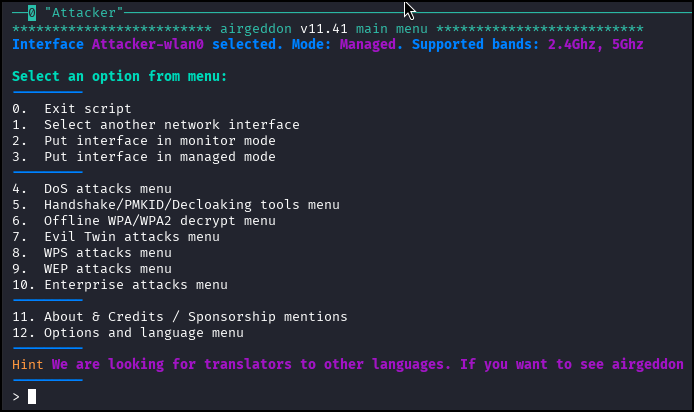
From here, select option 2 to put the interface into monitor mode. Note that airgeddon may fail at this step.
If Airgeddon hangs while putting the interface into monitor mode, exit airgeddon using [CTRL + c] and manually start the interface using the following command before restarting airgeddon.
airmon-ng start Attacker-wlan0
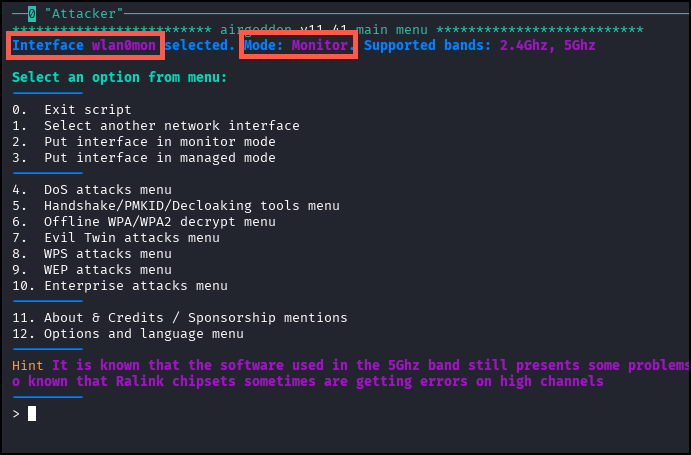
Ensure that the selected interface after putting it into monitor mode is wlan0mon.
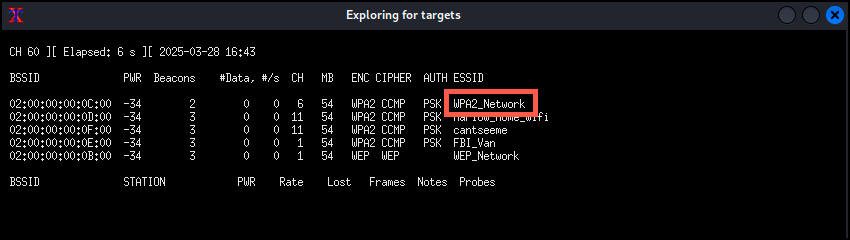
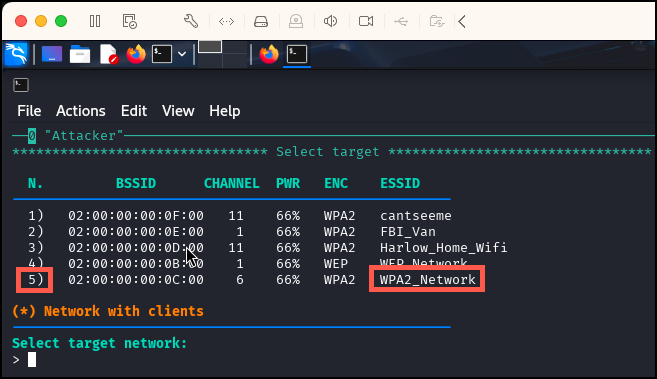
Select option 4 (DoS attacks menu) then select option 4 again (Explore for targets) and follow the prompts until airgeddon begins scanning for targets. Wait until Airgeddon finds the network (WPA2_Network) as see in the screenshot below.
Use [CTRL + c] to stop scanning for networks. Airgeddon will provide a selection screen containing all the networks located in the previous step. Input the menu option associated with WPA2_NETWORK and hit the ENTER key.
After selecting the target network, Airgeddon will apply the configuration alongside another menu seen in the screenshot below.
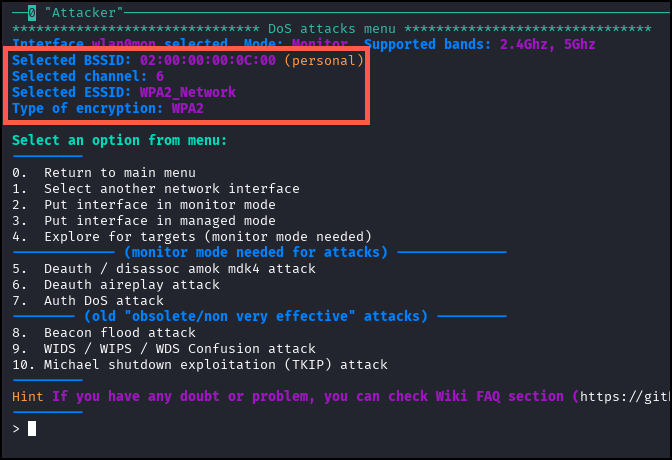
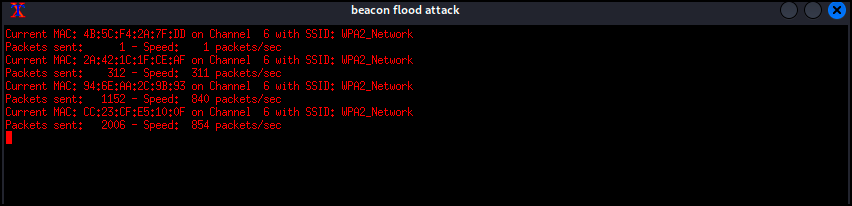
Select option 8 (Beacon Flood Attack). If prompted to activate DoS pursuit mode, input N and hit ENTER. Hit ENTER again to start the attack. The terminal will fill up with messages similar to the ones pictured below.
Service on this network has been denied!
When finished, press [CTRL + c] to close the window and exit airgeddon. Enter main_menu to return to the main menu.
Lab Complete
Congratulations! You have successfully completed Lab 06. You now understand:
- Using Airgeddon for wireless denial of service attacks
- Monitor mode configuration within Airgeddon
- Target reconnaissance and selection
- Beacon flood attack execution and impact
PREVIOUS LAB: Lab 05 - Cracking WPA Handshakes with Aircrack-ng
NEXT LAB: Lab 07 - Capture Active Directory Credentials with Evil-Twin Attack